Hello dear readers! My name is Sonia and I am glad to welcome you to my channel! Today we'll talk about an easy way to knit deep round neck of sweaters. And I'll tell you about my new method. Let's, to facilitate understanding of this topic, introduce such a concept as "sprout"
The sprout is the difference in the depth of the cutouts on the front and back. I believe that the sprout must be shaped so that the product does not pull back. This is especially pronounced in ladies with curvaceous forms.
This difference is achieved:
- by lengthening the back by knitting with shortened (rotary rows);
- by cutting the loops on the front is my new easy way that I will share with you today.
When we want to knit a pullover with a deep round neck, then lengthening the back by knitting in rotary rows will not work. This method is best used when knitting a product with a tight and shallow neck.
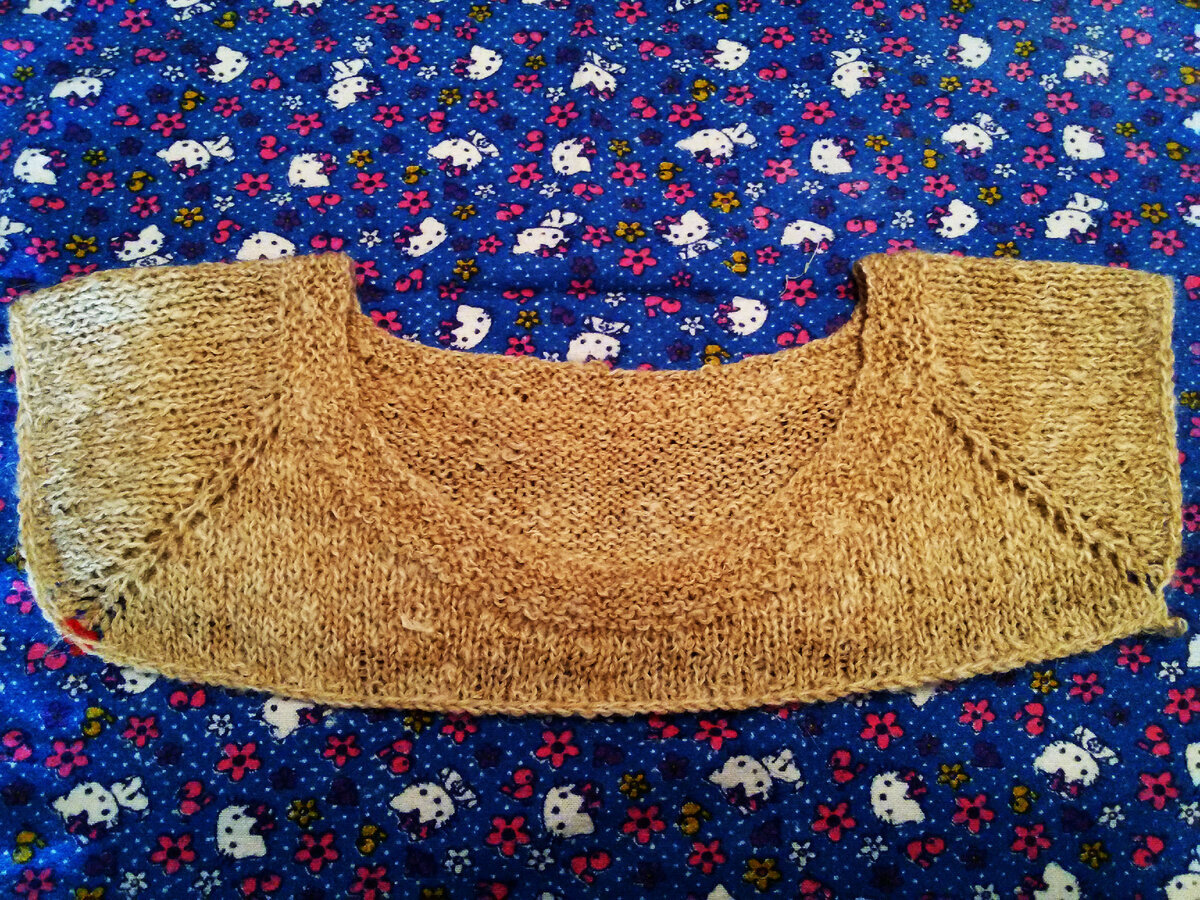
With my new method of knitting a sprout, we will cut the loops on the front and knit in a semicircle from one side of the front to the other side and backward, as a result we will get a very beautiful round neck and the back will be longer than the front. You can watch the video tutorial "Knitting a deep round neckline" on my Youtube channel "Knitting with Sonia" in detail.
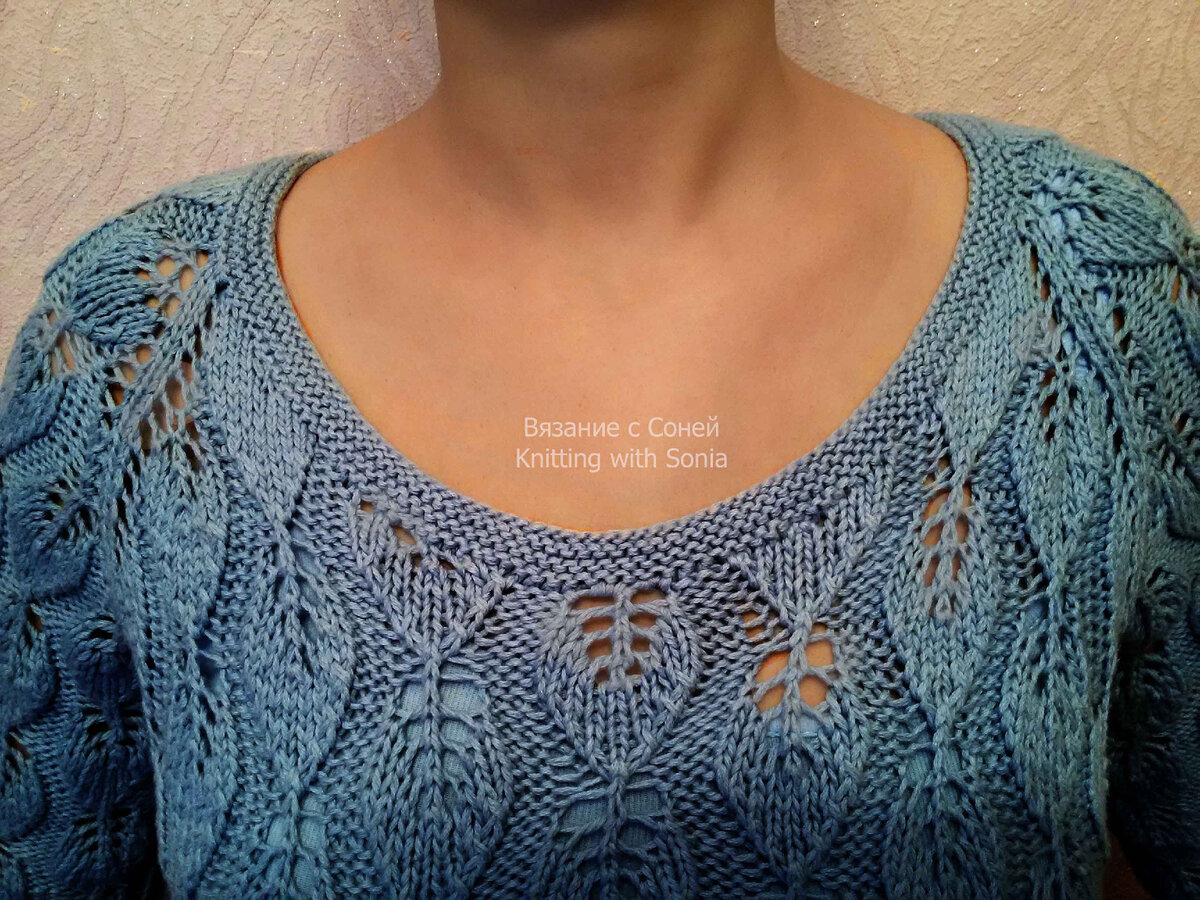
In the photo below, you can see that the loops in the neckline on the front are much more than the loops in the neckline of the back. If you want to make the neckline even deeper, then you need to take even more loops for the front of the pullover / blouse. In this lesson, I will show you how to make calculations and distribute the loops to the parts of the sweater and how to make a round neckline using a new method.
Step 1. First, we need to determine what depth of the cut we want. Measure in centimeters the circumference of the desired cutout depth around the neck. In my case, this length is 70 cm.
Step 2. You need to determine how many loops are equal to 70 cm. Before you start knitting, you must definitely knit a sample from the yarn from which you want to knit the future product and the knitting needle that you have chosen for it. Thanks to this sample, we determine the density of knitting in width and length (height), that is, how many loops are in 1 cm and how many rows are in 1 cm, respectively. I will soon write a detailed article on this topic, but for now you can watch a video tutorial on this topic.
In my case, the width of the density is equal to 2 loops, that is, 2 loops form 1 cm. Therefore, 70 cm x 2 loops = 140 loops.
So, to get a neckline with a length of 70 cm, we need 140 loops.
Step 3. Form a knitting pattern and distribute the loops over the parts of the blouse.
With a deep round neck, the distribution of the loops into parts is carried out as follows:
140/8 pieces = 17.5 sts. This means that 1 part is equal to 17.5 loops.
In order to distribute the loops over the parts of the sweater in the raglan top-down, we will make the following calculations.
back = 2.5 parts
2 sleeves = 2 pieces
front = 3.5 parts
This distribution of stitches will always come in handy when you want to knit a deep round neckline. You can change the number of loops, the size of the product, but the distribution will remain the same.
Let's determine the values of each part of the jacket in the loops.
1. Back = 2.5 parts = 17.5 loops x 2.5 = 43.75 = 44 loops. Back = 44 loops
2. 2 sleeves = 2 pieces. So 1 sleeve = 17.5 loops. Take 17 stitches in a rounded way.
3. Front = 140 - 44 - 17-17 = 62 sts / front = 17.5 sts x 3.5 = 61.25 - roundly take 62 sts, since we have 1 st from two sleeves.
When we add up all the parts of the jacket, you should get 140 loops!
On raglan lines, I take 1 loop for each. As you know, the loops for raglan lines are taken from the body of the product, we do not touch the loops of the sleeves. So for the raglan line on the back we will take 2 loops and now, the back = 42 loops. For raglan lines on the front take 2 sts and the front = 60 sts
Step 4. Determination of loops for sprout decoration. In my method for knitting a sprout, I cut the loops at the front. In order to determine how many loops you need to cut on the front, we will do the following:
- from the loops in front, we take away the loops of the back: 60 - 42 = 18 loops. This means that the front is 18 loops more than the back.
- Cut 9 sts on the right side of the front and cut 9 sts on the left side of the front.
When cutting 9 stitches on the front, we knit in rotary rows from one end of the front to the other end of the front, and vice versa. As a result, the difference we need on the back will be connected and a deep round neckline will be formed on the front.
- We cut 4 loops out of 9 as follows: cut 1 loop and knit the next 1 loop (repeat the process 4 times).
- Cut 5 out of 9 stitches as follows: Cut 1 stitch and knit the next 2 stitches (repeat the process 5 times).
This knitting method will create a beautiful slope of the neckline and the neckline will turn out to be beautifully round, very neat. Dear ones, further on is the practical part and you should definitely watch a video tutorial on this topic. I'll leave you links, follow them. Happy viewing and many thanks for reading my article!
HOW TO KNIT DEEP ROUND NECK. PART 1
HOW TO KNIT DEEP ROUND NECK. PART 2