
Disclaimer
I’m not responsible if you break your OS or PC, loose anything or get hacked at a later date by following this guide. Follow below at your own risk.
This guide has all the tweaks I have collected over the years. I have personally grinded through them all testing, tweaking and benchmarking. Doing my best to be sure they are not placebo.
Also doing my best to make sure my testing methods are not flawed or variable. This guide is for the max performance, lowest latency and a competitive advantage for gaming. Some of the tweaks will make your PC vulnerable, be aware and use a separate OS and system for gaming. Feel free to do what you are comfortable with, no one is judging if you skip steps.
Remember less is more...
This guide will constantly be updated, so please come back and recheck it regularly.
I did not invent or discover any of these myself, this list is compiled from the internet and personally tested by me. I can’t take credit for the tweaks themselves but I can take credit for compiling everything and spending the time to debunk/test them.
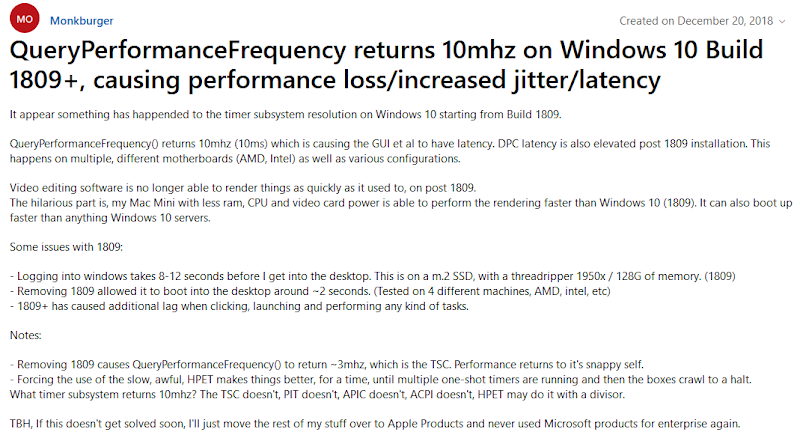
A big flaw has been discovered with new windows versions.
All windows versions 1809 + have a forced synthetic QPC timer of 10mhz.
Previous versions are true TSC between 2-4mhz (give or take) depending on the CPU speed.
As far as low latency and high performance, an older version under 1809 is the way to go.
I believe this synthetic timer is something to do with spectre, meltdown or security.
We all may be all on linux in the future with the way windows is going, time will tell.
Microsoft locked this thread, it’s worth reading…
https://answers.microsoft.com/en-us/windows/forum/all/queryperformancefrequency-returns-10mhz-on-windows/44946807-5355-4b36-ba3e-43aa86ce30c0
This guide was made for windows 10 pro 1809 redstone 5 october 2018 update.
Why?! To keep up to date with things, it’s easier to apply all tweaks from a later version to an older version vs the other way round. Do I recommend 1809, No! Many of the tweaks can be used in older versions so keep reading. Although I highly recommend a fresh install.
1903 also has the synthetic timer of 10mhz, including a serious kernel latency issue.
Avoid 1903...
If you really want raytracing you will need 1809 or above. My friends and I have tried to swap and edit system files in 1809/1903 from older versions to bring back the true timer. All attempts were unsuccessful. Stay posted, let’s hope we find a fix. That way you can have your cake and eat it too, regarding raytracing. Although I think it's safe to say that anyone reading this guide, including myself are not interested in raytracing.
Regarding low latency and high performance I would recommend...
- Windows 7 ultimate
(Build service pack 1)
Only up to dx11
The option to disable desktop composition natively
This is HANDS DOWN the best performing OS for raw latency and performance
More on timers below
A big thank you to
All the creators of tweak guides linked below
All my friends who have helped me on this journey
Some names worth mentioning, thank you for your help guys
n1kobg, St1cky, Cindafella, Munty, Dev0x0, Kristjan, Markus, Narf, detox, TopSnek, Felipe
1tap1337s, Dreammjow, detox, Klubnjakk, Joana d'Arc, PanosXidis, Hybrid, lipz, John_,
If you have anything to add or correct please contact me
I will be happy to mention you in this guide for your efforts
I really don’t like calling this “MY” guide, it should be “OUR” guide.
Although someone needs to format and compile it, so here we are.
This will be eventually be ported to a website so stay posted.
Support me
Consider supporting me, I do not expect donations although the offer is there.
If you really want to support me subscribing to my discord, youtube and twitch is enough.
Thank you in advance...
To boost performance, fps, responsiveness, lower latency and improve throughput.
Including tech support, advice, training and teaching for a fair priced fee.
https://twitter.com/fr33thytweaks
https://drive.google.com/open?id=1D5wcsgheEs9ickPv1ssGbDxrhqU0YzyB
All the shortcuts, scripts, reg files and programs you need for this guide
Some programs may be a false positive flagged by your antivirus
Keep in mind, running the script/reg files straight away may not apply
This is due to windows permissions, recheck manually as shown below
Although new laptops have come a long way, they still thermal throttle
Laptops also have limited bios settings most of the time
I highly recommend a good top end motherboard with good vrm and cooling
Check real reviews of boards from experts so you know what the motherboard is capable off
Never trust the manufacturers advertising, below are some reviewers I trust
Actual Hardware Overclocking
https://youtube.com/channel/UCrwObTfqv8u1KO7Fgk-FXHQ
Gamers Nexus
https://www.youtube.com/user/GamersNexus
Der8auer
https://www.youtube.com/user/der8auer
Many motherboard manufacturers claim to be high end nowadays are just not capable.
I have been burnt in the past by false advertising and quite possibly my lack of research.
A perfect example of this is the money I have wasted in the past on boards trying to get the advertised memory speeds of 4000mhz. My ram kit and the board I had at the time was “supposed’ to be supported it was just not capable of doing so because of bad design, bad vrm cooling and bad vrm. It’s a tough subject but as a rough guide at this time many z390 boards have good vrm and cooling.
You also want to consider the possibility of being locked out of options or simply BIOS options being hidden from you. Things like High Precision Event Timer among many other things tend to be excluded from user view and hidden in your BIOS. Without HPET option in bios you are unable to try out ACPI Power Management Timer. You can get your bios unlocked and modified like I did. There is a high risk doing this.
I was able to get my microcode flashed to remove spectre and meltdown patches, HPET option unlocked, Intel Management Engine Interface option unlocked and TCO Timer unlocked. These are all things to consider and worth talking about, I’m sure there are others.
Nvme or sata ssds for quick load speeds, boot times and no game stutters
I highly recommend steering clear of mechanical drivers unless you want them for storage
Intel "K" CPUs for overclocking
Most games only are really using 4 cores at this stage
New games are not optimized for more than 12 max threads/cores currently
Games most of the time perform better on just the cores, with hyperthreading disabled
INTEL recommended for lower overall latency
AMD CPU’s typically have higher latency and can’t run high end speed memory
AMD CPU’s are typically clocked lower and require more cycles to access memory or I/O
Nvidia XX80ti series GPU's
EVGA for older series
Cheapest “A” card for 1000 and 2000 series (bios can be flashed later)
Titan series GPU's are a waste of money
Only run one graphics card as sli or nvlink causes input lag
Sli or nvlink are only good for benchmarks and usually do not benefit game performance
Avoid AMD GPU’s, there are less options typically to remove input lag
High hz memory such as 4-4500hz DDR4 can help top end fps although only a little
Top end motherboards with good memory controllers are needed to run high hz memory
Low timing is crucial for memory at least 10 nanoseconds or lower is best
Try to pick something with solid speed and low latency
I highly recommend anything B Die at this stage
https://notkyon.moe/ram-latency.htm
https://docs.google.com/spreadsheets/d/1fXhkcVexz0YaLLc7dlm_WXfAqqY4ldxScKFxNFxeNgA/edit#gid=0
Closed or custom loop water coolers for CPU and GPU recommended
There are some really good air coolers out there, I will always recommend/prefer water
I recommend closed loop systems, they are easy to work with and install
Lower GPU and CPU temperatures will perform and overclock better
https://alphacool.com
https://noctua.at/en/products/cpu-cooler-retail
Run only one monitor to avoid input lag
Go for high refresh rate and low response time
I highly recommend a TN panel that is NOT freesync or gsync compatible
This is so you can set scaling to “display” NOT “gpu”
TN panels are worse for quality but have much lower latency
144-240hz refresh rate and 1ms (gtg) response time
Stick with 1920x1080p as higher resolutions kill frame rates
Displayport cable mostly recommended (ideally shorter the better)
Never use wireless devices
Do not run splitter or port boxes
Do not run extension cables
PS2 keyboards are debatably better for key rollover and latency
Although recently I have found the ps2 windows i8042prt driver to be a latency hog
If your getting a USB keyboard be sure to get NKRO (n-key rollover)
Mechanical switches are best (most gamers like cherry reds)
New optical keyboards have debatably lower latency
Never use wireless devices
Do not run splitter or port boxes
Do not run extension cables
Lightweight
No acceleration
No angle snapping
A shape that's comfortable for you
Decent sensor such as the new hero or 3366 sensor
Never use wireless devices (logitech are an exception)
Do not run splitter or port boxes
Do not run extension cables
Links worth looking at
https://teamliquid.net/forum/tech-support/333648-an-overview-of-mouse-technology
https://overclock.net/forum/375-mice/1607990-click-latencies-compiled.html#post_25414692
https://geekhack.org/index.php?PHPSESSID=o780ih46rejjrmlb5tjkmac2mp1aluvl&topic=56240.0
http://www.test-gear.pl/testy-i-recenzje/myszki/szybkosc-kliku/#szybkosc-kliku
http://esreality.com/?a=longpost&id=1265679&page=4
http://www.test-gear.pl/testy-i-recenzje/myszki/
http://rocketjumpninja.com/top-40/
Regarding wireless mouse, I have found in my testings with mouse tester that wireless mouse can sometimes go into a “sleep state” while in full use. I have confirmed this with the g900 and logitech wireless pro. Due to this, I now use these mice in wired mode.
See MICE TESTING below.
Get yourself a mouse bungee
Ideally a cloth and large pad
Glass pads are becoming a new trend, I am unsure of how the sensor can read the mouse pad
Gaming, motherboard and normal sound cards have around 250ms total sound directx latency
Audio interfaces can get as low as half the above directx total sound latency
Gaming, motherboard and normal sound cards also tend to produce whine/static
I highly recommend an audio interface if viable
Never use wireless devices
Do not run splitter or port boxes
Do not run extension cables
Gaming and normal headphones are not recommended
Studio monitoring headphones are best for true sound
Never use wireless devices
Do not run splitter or port boxes
Do not run extension cables
Delid your CPU
Lap your CPU’s IHS
There are kits to run your CPU without an IHS
Repaste your CPU IHS with thermal grizzly conductonaut
Repaste your CPU cooler with thermal grizzly kryonaut
Repaste your GPU cooler with thermal grizzly kryonaut
Replace your GPU thermal pads
Replace your MOTHERBOARDS vrm thermal pads
Be aware of your case air flow and cooling
Lower GPU and CPU temperatures will perform better and overclock higher
I should mention, there are measures that need to be taken and risks to be considered using liquid metal for cooling. Liquid metal can short circuit components the materials can corrode copper heatsinks. Do your research. I personally only use liquid metal under the CPU’s IHS.
Motherboard bios (avoid spectre and meltdown bios patches)
Gpu bios (flash to a higher power target bios)
Router and modem firmware
Other devices firmware
R0ach’s BIOS optimization guide
Dated, although a good read
TURN CSM ON IN BIOS
INSTALL WINDOWS IN MBR LEGACY MODE
A windows legacy install will have lower latency and will perform slightly better
Legacy also provides a much more snappier and consistent mouse movement
UEFI will always have something running in the background
This is such a debatable topic, although this is what I have found in my tests
The trade off to legacy is longer boot times vs uefi
I highly recommend using MBR legacy for your windows install
Usb ports
Usb controllers
Wifi
Bluetooth
Unused features etc
Less is more
Tool
Setup animator - disabled
Asus armory crate
Download & install armory crate app - disabled
Boot configuration
Fast boot -disabled
Above 4g decoding - disabled
Boot option #1 - select main boot drive and remove other boot selections
Ami native nvme driver support - off
Boot configuration
Boot logo display - disabled
POST report - 1 sec
Boot up numlock state - enabled
Wait for f1 if error - enabled
Option rom messages - disabled
Interrupt 19 capture - disabled
Setup mode - advanced mode
Csm (compatibility support module)
Launch csm - disabled (for uefi install)
(Below for legacy install)
Launch csm - enabled
Boot device control - legacy oprom only
Boot from network devices - ignore
Boot from storage devices - ignore
Boot from pci-e/pci expansion devices - ignore
Secure boot
Os type - other os
Delete all keys
Secure boot - disabled
Monitor
Cpu temperature led switch - off
Chassis intrusion detection supported - off
Water pump+ control - disabled
Aio pump control - disabled
High amp fan q-fan control - disabled
Waterpumps - set to 100% speed
3 pin fans - dc mode
4 pin fans - pwm mode
Set a fan profile that suits you
Advanced
Cpu configuration
Sw guard extensions (sgx) - disabled
Tcc offset time window - disabled
Hardware prefetcher - enabled
Adjacent cache line prefec - enabled
Intel virtualization technology - disabled
Hyper threading -
Enabled -
Faster workloads/processing/rendering
Better for encoding/streaming
Higher latency
Higher temps
Most of the time (lower fps - game engine dependant)
Can cause stutter
Disabled -
Slightly slower workloads/processing/rendering
Lower latency
Better response
Lower temps
Most of the time (higher fps - game engine dependant)
Less stutter
Better response
Better mouse input and feel
Hyperthreading will always have much more input latency then just the cores
Some games like Battlefield Multiplayer will benefit from hyperthreading ON
Although most games will not benefit and run smoother with hyperthreading OFF
Default is (Enabled)
Set to “Enabled” if you are unsure
I was proven wrong and I don’t use hyperthreading anymore
You will be able to overclock your CPU more or run a lower vcore voltage with HT disabled
Active processor cores - all
Thermal monitor - disabled
Execute disable bit - disabled
Cpu power management control
Boot performance mode - turbo performance
Intel speedstep - disabled
Intel speed shift technology - disabled
Turbo mode - enabled
Cpu c states - disabled
Cfg lock - disabled
System agent configuration
Vt-d - disabled
Above 4g decoding - disabled
Memory configuration
Memory remap - enabled
Dmi/opi configuration
Dmi max link speed - gen3
Peg port configuration
Pcie link speeds - gen3
Pcie spread spectrum clocking - disabled
Pch configuration
Pcie speed - gen3
High precision timer - unlocked with my custom BIOS mod
High precision timer - enabled
Enable TCO timer - unlocked with my custom BIOS mod
Enable TCO timer - disabled
Ioapic 24-119 entries - disabled
High precision event timer should always be enabled in the bios and disabled in the OS.
The only disadvantage of not having the HPET option unlocked/unhidden in your bios means you cant use or try the ACPI PMT clock. I would not recommend the ACPI PMT clock anyway.
HPET is hidden and enabled by default in most motherboard bios’s now.
Having HPET - disabled in bios will give you a lower timer resolution, although this will also cause major syncing issues. Including bad latency, mouse movement and performance.
This reflects in the timer resolution.
HPET “off” in bios & “off” in OS = a lowest timer res of 0.488XX
HPET “on” in bios & “off” in OS = a lowest timer res of 0.50000
More on this topic below
Pci express configuration
Pcie speed - gen3
Pch storage configuration
Sata controllers - enabled
Sata mode selection - ahci (don’t use raid it’s not reliable)
Aggressive lmp support - disabled
S.m.a.r.t. status check - disabled
Sata drives - disabled unused ports
Hot plug - disable all
Pch-fw configuration
Ptt configuration
Ptt - disable
ME state - unlocked with my custom BIOS mod = Intel Management Engine Interface
ME state - disabled (tested enabled vs disabled, disabled is fine - cold boot times longer)
ME state - disabled (tested enabled vs disabled, disabled is fine - cold boot times longer)
Tpm device selection - dtpm
Ptp aware os - ptp aware
Onboard devices configuration
Hd audio controller - disabled
Dvi port audio - disabled
Audio led lighting - disabled
When system is in working state - disabled
Q-code led function - disabled
Pch led lighting - disabled
Pciex16_3 bandwidth x4 mode
M.2 configuration - pcie mode
Hyper m.2 x16: - disabled
Usb power delivery in soft off state (s5) - disabled
Asmedia back usb 3.1 controller - enabled
Intel lan controller - enabled
Intel lan pxe option rom - disabled
Connectivity mode (wi-fi & bluetooth) - disable
Wifi - disabled
Bluetooth - disabled
Serial port - disabled
Apm configuration
Erp ready - disabled
Restore ac power loss - power off
Power on by ps/2 keyboard - disabled
Power on by pci-e/pci - disabled
Power on by ring - disabled
Power on by rtc - disabled
Pci subsystem settings
Sr-iov support - disabled
Platform misc configuration
Pci express native power management - disabled
Pci dmi aspm - disabled
Aspm 0 - disabled
L1 substates - disabled
Pci express clock gating - disabled
Ami link aspm control - disabled
Peg-aspm - disabled
Usb configuration
Legacy usb support - disabled (enable this to install windows in legacy mbr with usb)
Usb keyboard and mouse simulator - disabled
Xhci hand-off - enabled (I have found better mouse input with this on, test for yourself)
Usb single port override
Disable all unused ports
Network stack configuration
Network stack - disabled
Graphics configuration
Primary display - peg
Igpu multi-monitor - disabled
Ethernet connection/Nic configuration
Link speed - 100 mbps full
Wake on lan - disabled
Ai tweaker
Ai overclock tuner - xmp or manual
Xmp - xmp profile
Bclk frequency - 100
Bclk spread spectrum - disabled
Asus multicore enhancement - enabled - remove all limits
Svid behavior - best case scenario
Avx instruction core ratio negative offset - 0
Cpu core ratio - sync all cores
Core ratio - max turbo boost for cpu specs
Bclk frequency : dram frequency ratio 100:133 (ddr4 on some mobos prefer this vs 100:00)
Dram odd ratio mode - enabled
Dram frequency - set to max xmp profile
Oc tuner - keep current settings
Cpu svid support - disabled
Dram timing control
Maximus tweak - mode 2
Dram cas# latency - set to max xmp profile
Dram ras# to cas# delay - set to max xmp profile
Dram ras# act time - set to max xmp profile
Dram command rate - set to max xmp profile
External digi+ power control
Cpu load line calibration - level 6
Synch acdc loadline with vrm loadline - disabled
Cpu current capability - 140% (max)
Cpu vrm switching frequency - manual
Fixed spu vrm switching frequency(khz) - 500 (max)
Cpu power duty control - t.probe
Cpu power phase control - extreme
Cpu power thermal control - 120
Cpu vrm thermal control - enabled
Dram current capability - 130%
Internal cpu power management
Intel speedstep - disabled
Turbo mode - enabled
Long duration package power limit - 4095 (max)
Package power time window - 127 (max)
Short duration package power limit - 4095 (max)
Fclk frequency for early power on - 1ghz
BCLK spread spectrum - disabled
Cpu core/cache current limit max - 255.57 (max)
Ring down bin - disabled
Min cpu cache ratio - set to max for cpu specs
Max cpu cache ratio - set to max for cpu specs
Extreme over-voltage - disabled
Bclk aware adaptive voltage - disabled
Cpu core/cache voltage - manual mode
Cpu core voltage override - auto for now then
(find a stable value in stress testing for you and set it 1-1.4v)
Dram voltage - set to max xmp profile
Cpu vccio voltage - auto for now then
(find a stable value in stress testing for you and set it 1-1.3v)
Cpu system agent voltage - auto for now then
(find a stable value in stress testing for you and set it 1-1.3v)
Some low end motherboards will set SA and VCCIO voltages too low (under 1v)
In this case set it to a minimum 1.1v manually and stress test
This is for the memory controller and values will depend or ram specs and speeds
Sata mode selection - ahci (don’t use raid it’s not reliable)
Intel(r) speedstep(tm) - enabled
(disabled for a desktop msi bios would not run turbo mode without this)
Erp lot 3 support - disabled
Wake up on lan s5 support - disabled
Win/fn key swap - disabled
Network stack - disabled
Intel virtualization technology - disabled
Vt-d - disabled
Thunderbolt firmware update - disabled
Cpu hyper-threading -
(See bios settings above regarding pros and cons with hyperthreading, leave enabled if unsure)
Cpu c states - disabled
(Enable these below to install windows in legacy mbr with usb)
Legacy usb support - enabled
Xhci hand-off - enabled (I have found better mouse input with this on, test for yourself)
Usb mass storage driver support - disabled
Usb transfer time-out - 20 sec
Device reset time-out - 20sec
Device power-up delay - auto
Full fan speed - disabled
Adjust cpu ratio - max turbo boost for cpu specs (or downclock if thermal throttling)
Adjusted cpu frequency - max turbo boost for cpu specs (or downclock if thermal throttling)
Adjust ring ratio - max turbo boost for cpu specs (or downclock if thermal throttling)
Cpu core voltage - auto for now then
(find a stable value in stress testing for you and set it 0.8-1.2v?)
Cpu core voltage offset - 0
Cpu ring voltage - auto for now then
(find a stable value in stress testing for you and set it 0.8-1.2v?)
Clock frequency - 10000 (max)
Vr current limit 1022 (max)
Power limit 1 - 500 (max)
Power limit 2 - 500 (max)
Dram profile - default dimm xmp profile
Bootup numlock state - enabled
Fast boot - disabled
Boot mode select - csm for legacy/uefi for uefi
(see above, legacy install recommended)
Boot option 1 - select main boot drive and remove other boot selections
Security device support - disable
Delete all keys
Secure boot - disabled
Secure boot mode - disabled
Setting all ram timings manually is recommended or the motherboard will train and change them to produce worse results, yes this includes rtl timings. I have found some motherboards will fight against you when timings are left at automatic.
Stress test your CPU with a NON AVX stress tester, 90% of us will not be using AVX
Stress test your RAM with a decent stress tester
See A STABLE SYSTEM below
A FRESH INSTALL
I recommend following this guide in order below to avoid issues
Features and services change in windows constantly with updates
This guide is for 1809, many of the tweaks may be used in older versions also
Some services and options for older versions may change or be named differently, good luck
With this guide and 1809 you should be able to get down to around…
-4 background process
-23 windows processors
-440mb ram usage on bootup
With the system fully functional
This guide is not at all for security and will make things vulnerable
I recommend using a seperate drive and separate updated windows install for secure use
Use this guide, install drive, tweaks for gaming and performance use
Backup your files on an external hard drive before you go ahead with this
You might want to download and backup your network driver on a usb depending on the card
Unplug other hard drives to save yourself the hassle of creating a bootable system partition later
Windows skips creating a bootable system partition with other OS install drives connected
Follow the guide in order
Driver updates, windows updates and windows feature updates must be disabled in gpedit.msc
(Before you connect to the internet)
Any kind of major driver or os update/install may revert all your tweaks back to default
Windows will install drivers for you without a choice
Major changes such as sfc/ scannow, tron script and some repair programs will revert things
Be aware and save yourself the hassle of doing it all over again
A work around for security may be to install an old enterprise version (avoid 1809)
They typically come with 10 years of security updates
Although I do not recommend this from a performance standpoint
Security updates tend to ruin performance
I do NOT recommend LTSC 2019 enterprise
Others and myself have tested 1809 ltsc, it’s unstable for overclocked gaming rigs
Driver and device support can be a big issue for some systems (blue screens)
Older versions of enterprise are ok
Enterprise still comes with bloatware and will only save you a few minutes
Ntlite, msmg toolkit and winreducer
https://www.majorgeeks.com/files/details/msmg_toolkit.html
https://www.winreducer.net/winreducer-ex-100.html
Feel free to use Ntlite, MSMG toolkit or Winreducer on your iso to save some time if you wish
Although, this guide includes stripping out everything manually so it’s up to you
Download windows iso
I have provided the genuine 1709 iso in my google drive
If you wish to find your own iso here are some options for you below
For the latest version, use an agent switcher on your web browser then go to
Microsoft download website
https://microsoft.com/en-au/software-download/windows10
Microsoft windows and office iso download tool
https://www.majorgeeks.com/files/details/microsoft_windows_iso_download_tool.html
The eye
http://the-eye.eu/
Tech bench
https://tb.rg-adguard.net/public.php
Insert a usb - at least 8gb
Open Rufus Windows USB Tool
Create a bootable disk using - select (open iso file)
Device - usb
Boot selection - standard windows installation
Partition scheme - gpt partition scheme for uefi
- mbr partition scheme for legacy (recommended)
Target system - fat32 for uefi
- ntfs for legacy (recommended)
Cluster size - default
New volume label - insert a name here
Start
INSTALLING WINDOWS
Some usb BIOS settings may need to be turned on for a usb boot, see above
Set your bootable usb in BIOS to boot
(IF INSTALLING LEGACY INSTALL - CHOOSE NON UEFI USB TO BOOT)
Sometimes there will be two usb bootable options in bios select the one that does not say UEFI
Windows install
Language - English united states
Time - English united states
Keyboard - US
Activate windows - skip this step
Select - Windows 10 Pro
If this page does not show for your pc
It will install "home"
"Pro" can be activated later by following below
Accept terms - next
Custom: install windows only
Windows setup
Delete all partitions
Next
Installing windows
Windows needs to restart to continue
Once restarting take out usb OR change bios boot settings
Set region
Set keyboard layout
Skip 2nd keyboard layout if possible
Connect now to save time later - no
Whos going to use this pc - insert name here
This is creating a local account
A local account is a must never link your windows account
Create a super memorable password
Leave blank - quick boot times (optional)
Make cortana your personal assistant - decline
Do more across devices with activity history - no
Choose privacy settings for your device - turn all off to no
(scroll down there are more settings to turn off)
Were getting everything ready for you
Upgrade to windows 10 pro
If windows installed home by default on your pc follow below
This usually happens on laptops, which will install home without giving you a choice
You NEED pro to use gpedit.msc commands, this is the only way to properly disable updates
In windows settings
System and security
Activation
Enter generic windows 10 pro product key
VK7JG-NPHTM-C97JM-9MPGT-3V66T
Activate and restart
Check you installed legacy
Run msinfo32
Bios mode - LEGACY
Run
Diskmgmt.msc
Right click, properties on disk
Volumes tab, partition style - MBR
If you wanted legacy and you see UEFI and GPT
You did something wrong, start over
Turn updates and driver installs off
Control Panel\System and Security\System
Advanced system settings
Hardware
Device Installation Settings
No
In gpedit.msc
Computer configuration
Administrative templates
Windows components
Windows update
Configure automatic updates - disabled
Specify intranet microsoft update service location - enabled
Enter these links below in boxes to the left
http:\\neverupdatewindows10.com
http:\\neverupdatewindows10.com
http:\\neverupdatewindows10.com
Remove access to use all windows update features - enabled
Do not connect to any windows update internet locations - enabled
Do not include drivers with windows updates - enabled
Restart pc
part 1 END