Registered users can create their own teams and boards, invite other users to collaborate on their boards or be invited as collaborators or team members.
To create a Miro profile, take the following steps:
1. Fill out the Name, Work email and Password fields in the registration form, tick to agree to Miro Terms of Service and Privacy Policy and click Get started now.
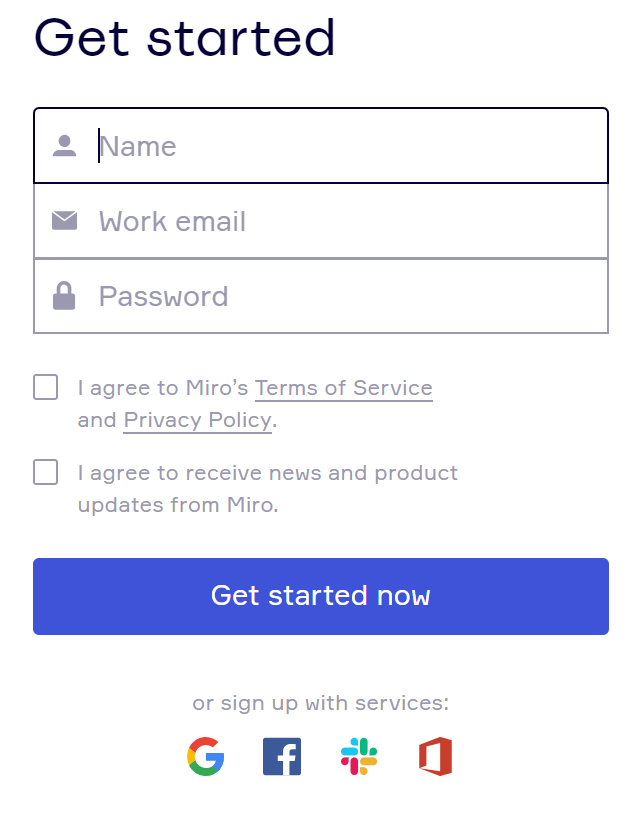
Sign up page
This will redirect you to a page with a field where you are to submit your confirmation code.
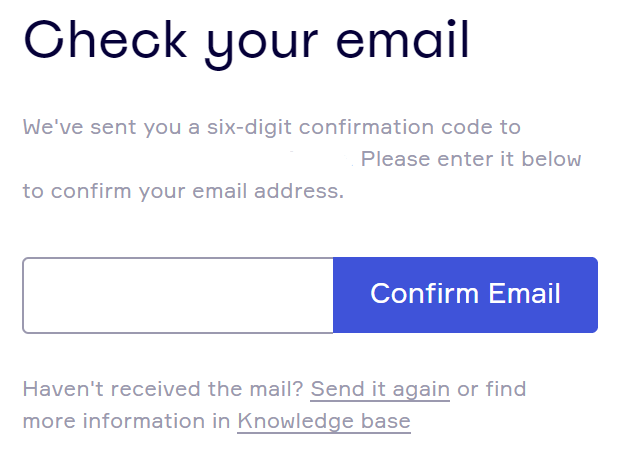
Email confirmation page
2. Open the registration email with the code sent to you right after you clicked Get started now.
Confirmation code
3. Click Confirm your email button in the message or enter the code in the box and click Confirm email.
✏️ If you haven't received a confirmation email from us, please try the solutions we suggest in Registration Confirmation Issues article or contact our Support Team at support@miro.com.
Some more steps to start whiteboarding with Miro:
1) Set up your team - enter the name for the account, choose your role in the company, set the size and put a checkbox if you want anyone with your domain join your team.
At this stage, you can also be suggested to join a team accessible by users with your domain.
2) Invite your teammates from Slack, share the invite link or invite via email or skip this step - you will be able to invite collaborators later:
3) Choose a template for your first board or continue without any templates and start whiteboarding right away! Be sure to watch all the tutorials to get started faster.
💡 You can always get back to the tutorial materials and other helpful resources in the Learn & Inspire center on the board: